DYNA BEADS MOTORBIKE TYRE FITTING INSTRUCTIONS
There are 3 ways of installing Dyna Beads in Bike Tyres.
- Installation with applicator*.
- Installation without applicator (direct to tyre).
- Installation for tubed tyres*.
*Tubed tyres and tyres already fitted onto the rims will need an applicator.
DYNA BEADS TYRE BALANCERS
APPLICATOR INSTALLATION
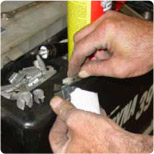 1.First, cut the
corner off the top of the bag.
1.First, cut the
corner off the top of the bag.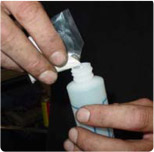 2. Next, carefully pour the beads into the Applicator bottle and replace the cap.
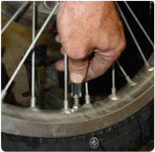 3. Thread the plastic hose down onto the valve stem
 4. Ensure it is threaded all the way.
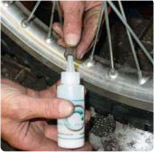 5. Attach the bottle to the hose, then slowly tip the bottle up, tapping with a finger, until you get a slow stream of beads.
 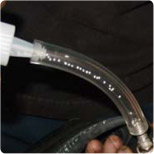 6. If you rush it, it will jam up. If it does, lower the bottle and tap on the valve stem until it clears, then start slowly again. (Last picture is from a tube install, but the idea is the same).
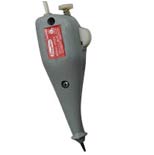 7. Speed things up with vibration! The best tool we've come across is an engraving tool.
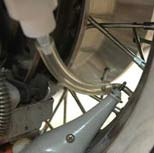 8. Straight or 90° valve installation. While we are showing this on a motorcycle install, a large number of our off road customers use this same method when installing larger quantities of beads.
DYNA BEADS TYRE BALANCERS
DIRECT TO TYRE INSTALLATION
This is the most common type of Dealer-Preferred installation for motorcycles, due to its simplicity and speed.
 1. We start with the first tyre bead pushed down over the rim. Apply a light coat of bead lubricant to the outer surface of the tyre only, never the rim.
It’s imperative that you do not get any bead lubricant into the inside of the tyre surface. This is the only mistake you can make, and will result in vibration when the beads catch and hold (think fly paper…) to the sticky substance.
2. Cut the
corner off the
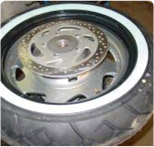
top of the bag.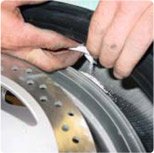 3. Carefully pour the beads into the concave portion of the tyre. Do not leave the bag in the tyre.
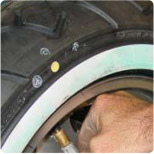
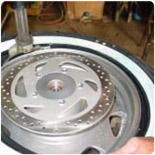 4. Carefully work the second tyre bead down over the rim..
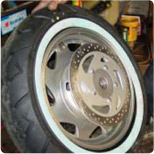 5. Stand tyre up with the valve stem at the top. All the beads will roll down to the bottom.
 This is important so that the air blast required to seat both tyre beads do not blow the beads all around where they can get caught between the tyre beads and the rim. If this happens, you will get an air leak.
 6. Apply the air chuck until both tyre beads have popped onto the rim. Insert the valve core Inflate to the proper pressure.
DYNA BEADS TYRE BALANCERS
TUBE TYRE INSTALLATION
You should always install Dyna Beads in the tube before you install the tube into the tyre; it’s much faster and easier.
Most tubes have a very small hole in the center, much smaller than a standard valve stem, so they should be enlarged to 1/8” (.125) to give you a quick install. It takes about 2 seconds to do this, so it’s very quick.
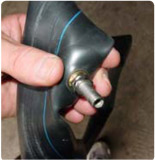 1. The most important thing to do is to hold the tube correctly, so the drill does not puncture the tube. As the picture shows, just grab the tube on the vulcanized support area between your fingers, and make sure there are no folds of rubber behind the valve stem.
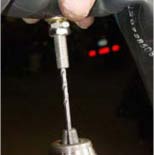 2.Chuck up the drill bit in the drill, hold the valve stem
upside down as shown, and as straight as possible, run
the drill bit through the valve stem. Make one pass only. You will feel the bit pop through the end of the brass stem. The chips will come out the bottom.3. Cut the
corner off the
top of the bag.4. Next, carefully pour the beads into the Applicator bottle and replace the cap.
2.Chuck up the drill bit in the drill, hold the valve stem
upside down as shown, and as straight as possible, run
the drill bit through the valve stem. Make one pass only. You will feel the bit pop through the end of the brass stem. The chips will come out the bottom.3. Cut the
corner off the
top of the bag.4. Next, carefully pour the beads into the Applicator bottle and replace the cap.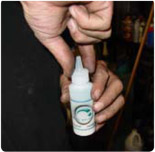 5. Install the cap and clip the end off the cap so you have about a 1/8” hole.6. Thread the plastic tube down onto the valve stem. Attach the bottle to the plastic hose. Hold the tube so that there is space behind the valve stem, and the valve stem is as vertical as possible, and start a small, steady stream of beads going down the tube. If they clog, just tip upside down so they go back into the bottle.
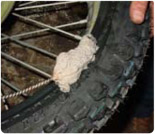 7. Install the first tyre bead over the rim. Install the tube into the tyre. Now apply a light coat of bead lube on the outside surface of the tyre.
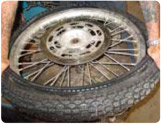 8. Get the second bead started down over the rim.
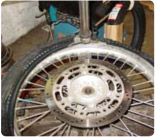 9. Finish installing the second bead over the rim. You’re
done and ready to go, and without any weights!.
9. Finish installing the second bead over the rim. You’re
done and ready to go, and without any weights!.